How do I install a post divider?
First, choose "Design"--at the top of your blog--and then "Layout" and "Edit HTML"(near top of page). Scroll down until you see this:
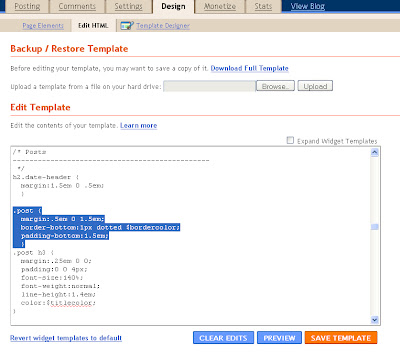
REPLACE that highlighted section with the following:
.post {
background: url(POST DIVIDER CODE);
background-repeat: no-repeat;
background-position: bottom center;
margin:.5em 0 1.5em;
border-bottom:0px dotted $bordercolor;
padding-bottom:5.5em;
}
Copy the post divider code that you want from Simply Blog It Backgrounds, like so:
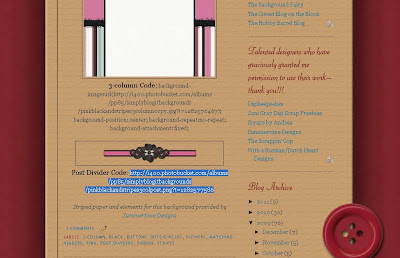
...and add it into your new code, here:
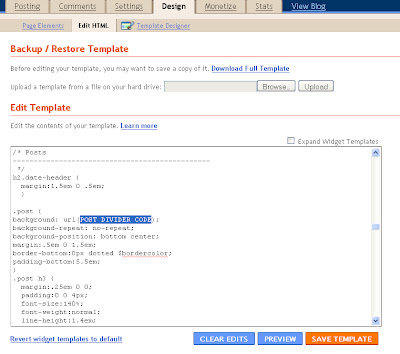
Click on "Preview" at the bottom of the page to see if it's how you like it. If so, click "Save Template" and you're done! If not, keep going...
My post divider runs into the text above it. Help!
Okay--here's what you do: scroll down just a little below where you added the code for your post divider. You'll find this:
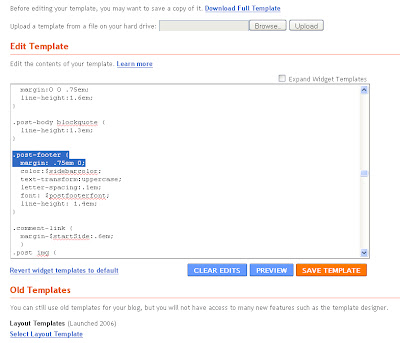
IMMEDIATELY UNDERNEATH that code, you'll add a new line that says this:
padding-bottom:?em;
Now it will look like so:
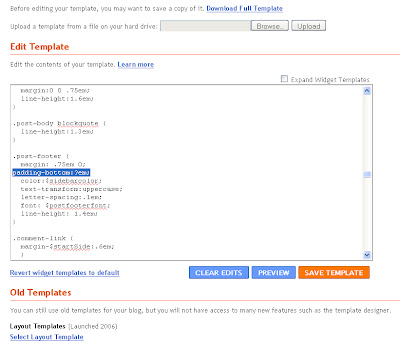
Where the question mark is...
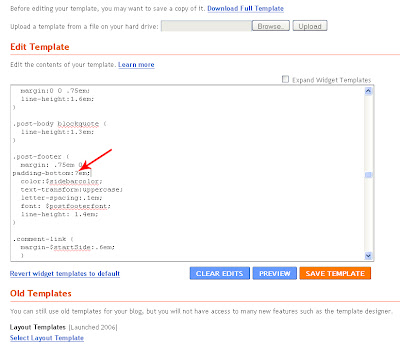
...add a number. Press "Preview" to see what it did to your post divider. If it added too much space, decrease your number. If it didn't add enough, increase your number. When you've found the right number, click "Save Template." Done!
If, at this point, you don't like the post dividers at all, click "Clear Edits" and you'll go back to how it was before you began this process. :) If you have further questions, feel free to email simplyblogit@gmail.com.
Happy blogging!

2 comments:
My post divider is down too far, how do I fix that?
This is a very helpful guide for installing blog post dividers.
Post a Comment